Contents
Chapter 2: Installing MozyHome
There are multiple steps to the installation process:
1. Download the MozyHome client from the Mozy Web site.
2. Install the software on your computer.
Note: If you are migrating from one computer to another, or replacing a computer on an existing MozyHome account, see: Replacing a Computer.
3. Activate the client.
4. Create initial backup sets.
5. Configure bandwidth.
6. Advanced configuration.
This step is optional during the install. It can also be performed at any time after the install. see Using Advanced Configuration. for more information.
7. Configuring MozyHome.
The following topics are available:
Topics:
• Downloading the MozyHome Client
• Installing the MozyHome Client
• Using the Configuration Wizard
• Selecting Backup Sets
• Configuring Bandwidth
• Selecting Your Backup Speed
Downloading the MozyHome Client
1. In your browser's address bar, type https://mozy.com/login, then press Enter.
2. Specify your email address and password in the appropriate fields, then click Log In.
3. In the left-hand navigation, click Download Mozy.
4. Click Download for Win.
5. Browse to the location where you want to save the file, then click Save File.
Installing the MozyHome Client
1. Browse to the location where you saved the MozyHome client, then double-click the MozyHome Client on Windows executable file (ends in .exe). The MozyHome Wizard starts.
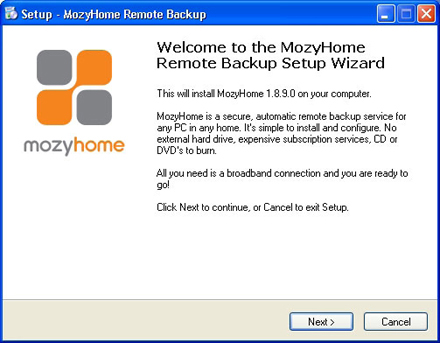
Figure: Setup Window
2. Click Next to continue with the Setup Wizard.
3. Read the license agreement, then select I accept the agreement.
4. Click Next.
5. Specify the location for the installation or click Browse to search for a location, then click Next.
6. Perform one of the following options:
• Click Next to accept the default Start Menu folder for MozyHome.
• Specify a name for the MozyHome folder Start Menu folder, or click Browse to search for an existing Start Menu folder.
7. Click Install to start the installation.
8. Perform one of the following options:
• To begin the configuration process, select Launch MozyHome Configuration Wizard, then click Finish.
• To finish the installation without starting the MozyHome Configuration Wizard, deselect Launch MozyHome Configuration Wizard, then click Finish.
Attention: If the installation activates your firewall software and asks whether you want to allow MozyHome to access the Internet, select the option that always allows MozyHome Internet access.
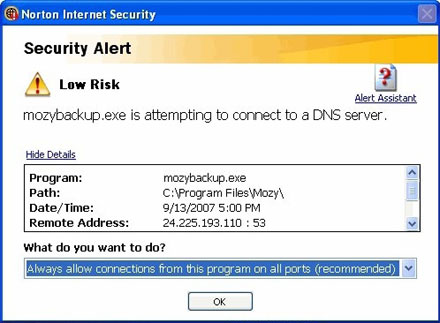
Figure: Security Alert Window
Using the Configuration Wizard
1. Start the MozyHome Configuration Wizard.
2. Depending upon your selection when you finished the installation, you have two choices for starting MozyHome.
• The MozyHome Configuration Wizard might have already started automatically after the installation.
• If the MozyHome Configuration Wizard is not running, right-click the MozyHome icon in your
system tray, then click Configure. in your
system tray, then click Configure.
3. Specify your username (this is your email address) and password in the appropriate fields.
4. Click Next.
Configuring Encryption.
You can select from mulitple encryption types:
• Encrypt my data with MozyHome's 448-bit Blowfish key
• Encrypt my data with my own personal 256-bit AES key
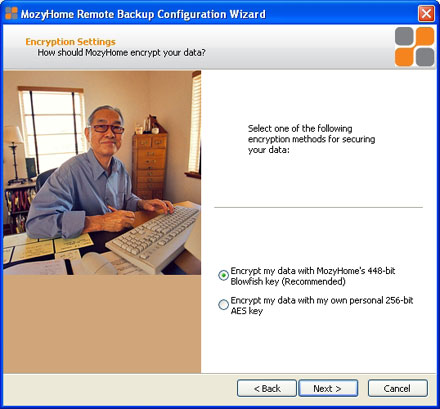
Figure: Encryption Options
1. Select one of the following choices:
• Encrypt my data with MozyHome's own 448-bit key
• Encrypt my data with my own personal 256-bit AES key
Caution: If you select Encrypt my data with my own personal 256-bit AES key, you are
responsible for remembering that key. If you forget your personal key, you will not be able to
access your backed up files when they are restored.
2. Click Next.
• If you selected Encrypt my data with MozyHome's 448-bit Blowfish key, skip to Selecting Backup Sets.
• If you selected Encrypt my data with my own personal 256-bit AES key, continue to Managing Your Own Key.
Managing Your Own Key
If you selected Encrypt my data with my own personal 256-bit AES key, then proceed with the following
steps:
1. Perform one of the following tasks:
• Enter your key in the field provided.
• Click Import Key to import your key from a file.

Figure: Self Encryption Key Window
2. Click Next.
3. When prompted to save your key, click Yes.
Note: It is recommended that you save your key in case you need to restore your backed up data.
4. Select the location on your computer where you want to save your key, then click Save.
5. Click Yes to confirm that you understand that if you lose your key, neither you nor Mozy will be able to decrypt your data.
Selecting Backup Sets
Backup sets have been prebuilt for file types that are common to most users. By default, each of these backup
sets that pertain to your files is selected for backup.
1. Right click the Mozy icon in the system tray, then select Configure.
2. Click the checkbox next to the backup set to include it in your backup. You can double-click the name of the set to view a list of files that is included in the backup set.
3. To select exclude backup sets from the backing up, deselect the checkbox next to the backup set.
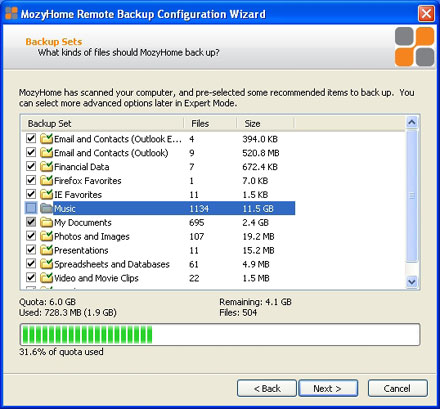
Figure: Backup Sets
4. You can also edit the backup sets from this screen or create your own. Right-click in the Backup Set window,
then select the function you want to perform. For instructions on creating custom backup sets, see Using Advanced Configuration.
5. Once you have finished selecting your backup sets to include, click Next.
Configuring Bandwidth
MozyHome checks your computer's bandwidth to make sure that it has the required broadband connection for the
online backups.
1. Click Start Test to initialize the test.
The progress bar indicates the progress of the bandwidth test.
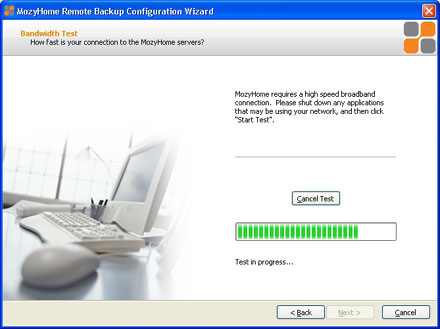
Figure: Bandwidth Test
When the test has completed, the wizard displays your upload speed.
2. Depending upon the results of your test, perform one of the following choices:
• If the bandwidth test passes successfully, click Next to continue with the configuration.
• If the bandwidth test fails, you must verify that you have a fast enough connection to use MozyHome.
MozyHome requires a high speed Internet connection to perform online backups.
Selecting Your Backup Speed
MozyHome allows you to select the speed of your backups. You can select either to have faster backups or better
performance for your computer.
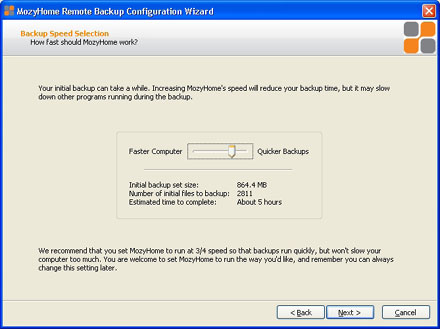
Figure: Backup Speed
1. Click and hold the slider to select either quicker backups (slide to the right) or faster computer response time
(slide to the left).
2. Click Next to continue.
The Setup Complete window appears.
3. To finalize the MozyHome Configuration Wizard, select from one of the following options:
• Start your initial backup immediately
• Let MozyHome start the initial backup automatically when my computer is idle
• I'd like to continue configuring my backup in Expert Mode
If you select this option, see Using Advanced Configuration.
4. After making your selection, click Finish to finish the Configuration Wizard.
If you selected to Start your initial backup immediately, the initial backup may take quite a long time
depending on the amount of data and your upload time. However, after the initial backup, future backups
only take minutes. |